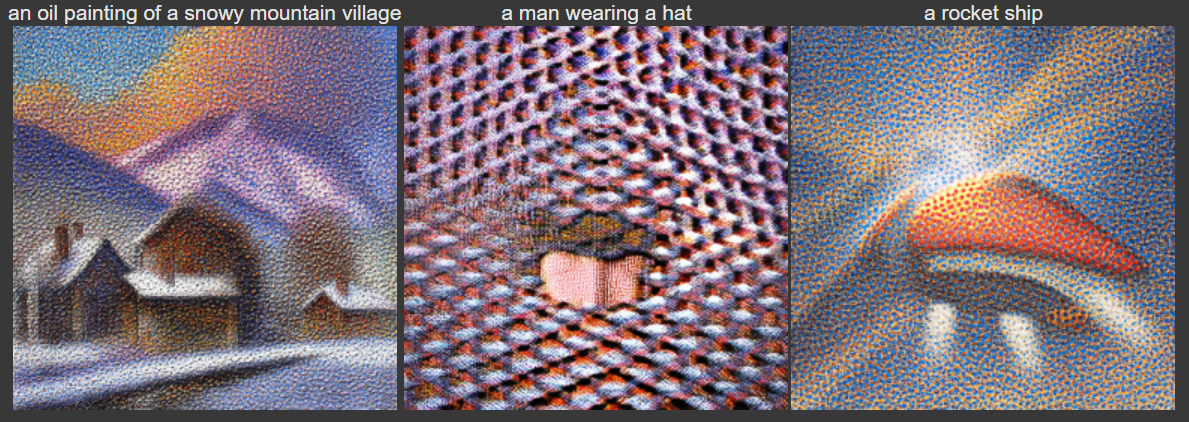
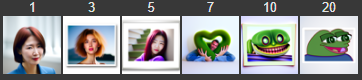
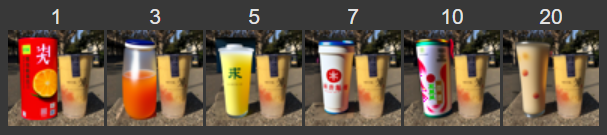
5 inference steps
In this project, I used the DeepFloyd diffusion model to explore different denoising approaches. In the second part, I created my own UNet and diffusion model from scratch.
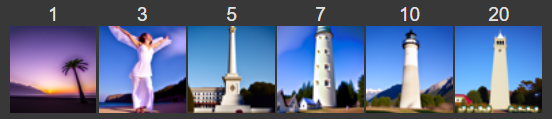
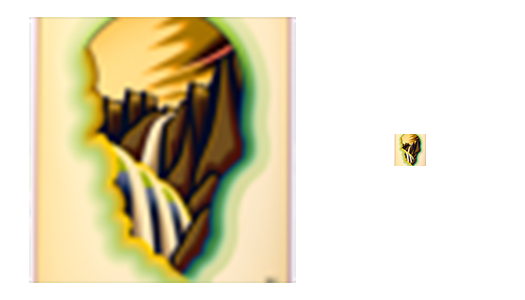
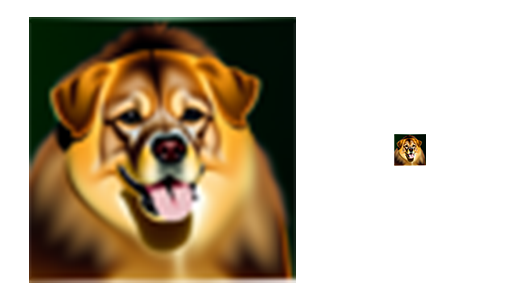
In this part, I create an instance of the DeepFloyd model (using seed=180) from HuggingFace and sample three images from them. These 3 images are sampled using text prompts ‘an oil painting of a snowy mountain village’, ‘a man wearing a hat’, and ‘a rocket ship’, respectively.
I also try sampling these images at different num_inference_steps. The results are shown below.
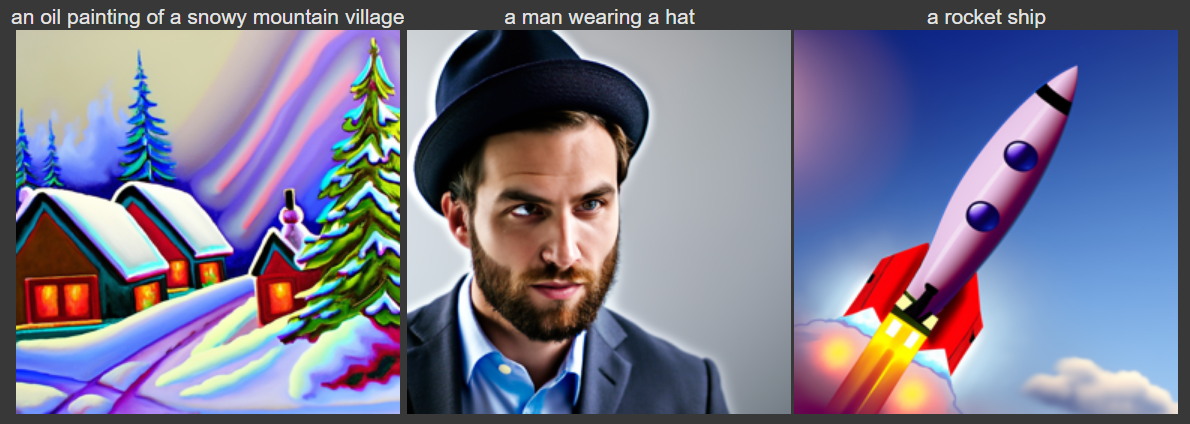
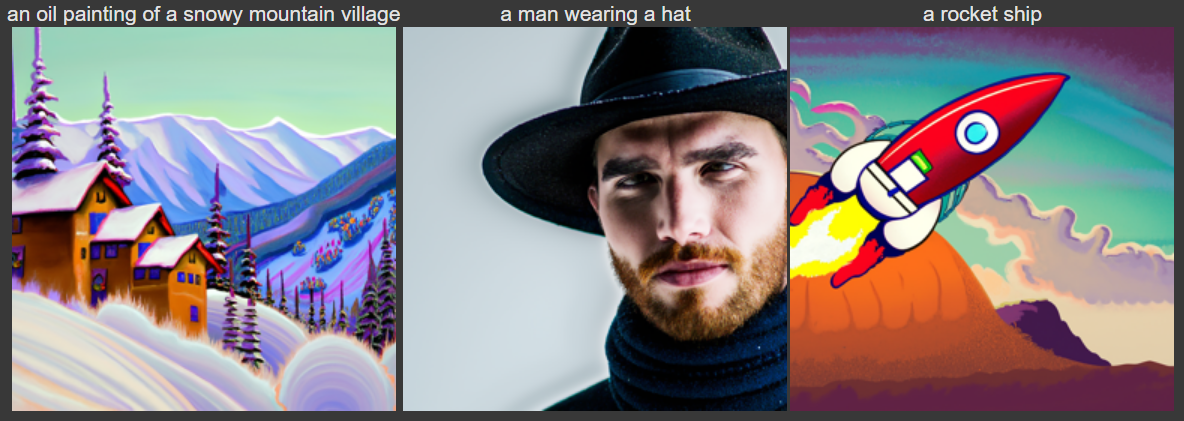
For num_inference_steps = 20 and 40, the quality of the image in relation to the text prompt seems to be quite well. I thought it was interesting how the model interprets ‘a man wearing a hat’ consistently as a photo of a man, instead of a painting or cartoon. In contrast, ‘a rocket ship’ is interpreted as a cartoon or drawing rather than a photo.
For num_inference_steps = 5, the images look quite grainy. ‘an oil painting of a snowy mountain village’ still produces a matching image, but the results for the other two prompts appear much more vague.
Additionally, I feel that num_inference_steps = 40 returns more detailed images than num_inference_steps = 20, such as more background detail (except for the man wearing a hat).
In this part, I implement the forward process of adding noise to a clean image. For a timestep t, I add an epsilon value that is randomly sampled from a standard normal distribution, scaled by a predetermined alpha value (determined by timestep).

I perform the forward process to noise the Campanile at t=250, t=500, and t=750.


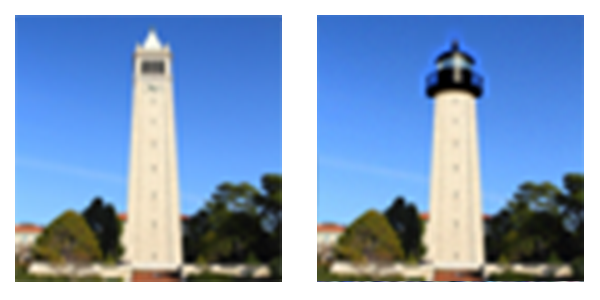
In this section, I attempt to denoise the Campanile images I generated above using classical and one-step methods.
First, I try adding a classic Gaussian blur…


We can see that this doesn’t work out very well. Not only is the Campnile blurry, but we can still see the noisy pixels.
Second, I try using a pretrained UNet diffusion model to denoise the images in one step. The diffusion model was trained with text conditioning, so for this part I use the prompt ‘a high quality photo’.


Looks better.. but the image still looks suboptimal when attempting to denoise from higher noise levels.
Diffusion models are designed to denoise iteratively rather than all in one step like attempted above. In this part. I iteratively denoise using a list of strided timesteps, starting at t=990 and decreasing t by 30 until reaching 0. This is done to save time (as denoising at every single time step would take too long).
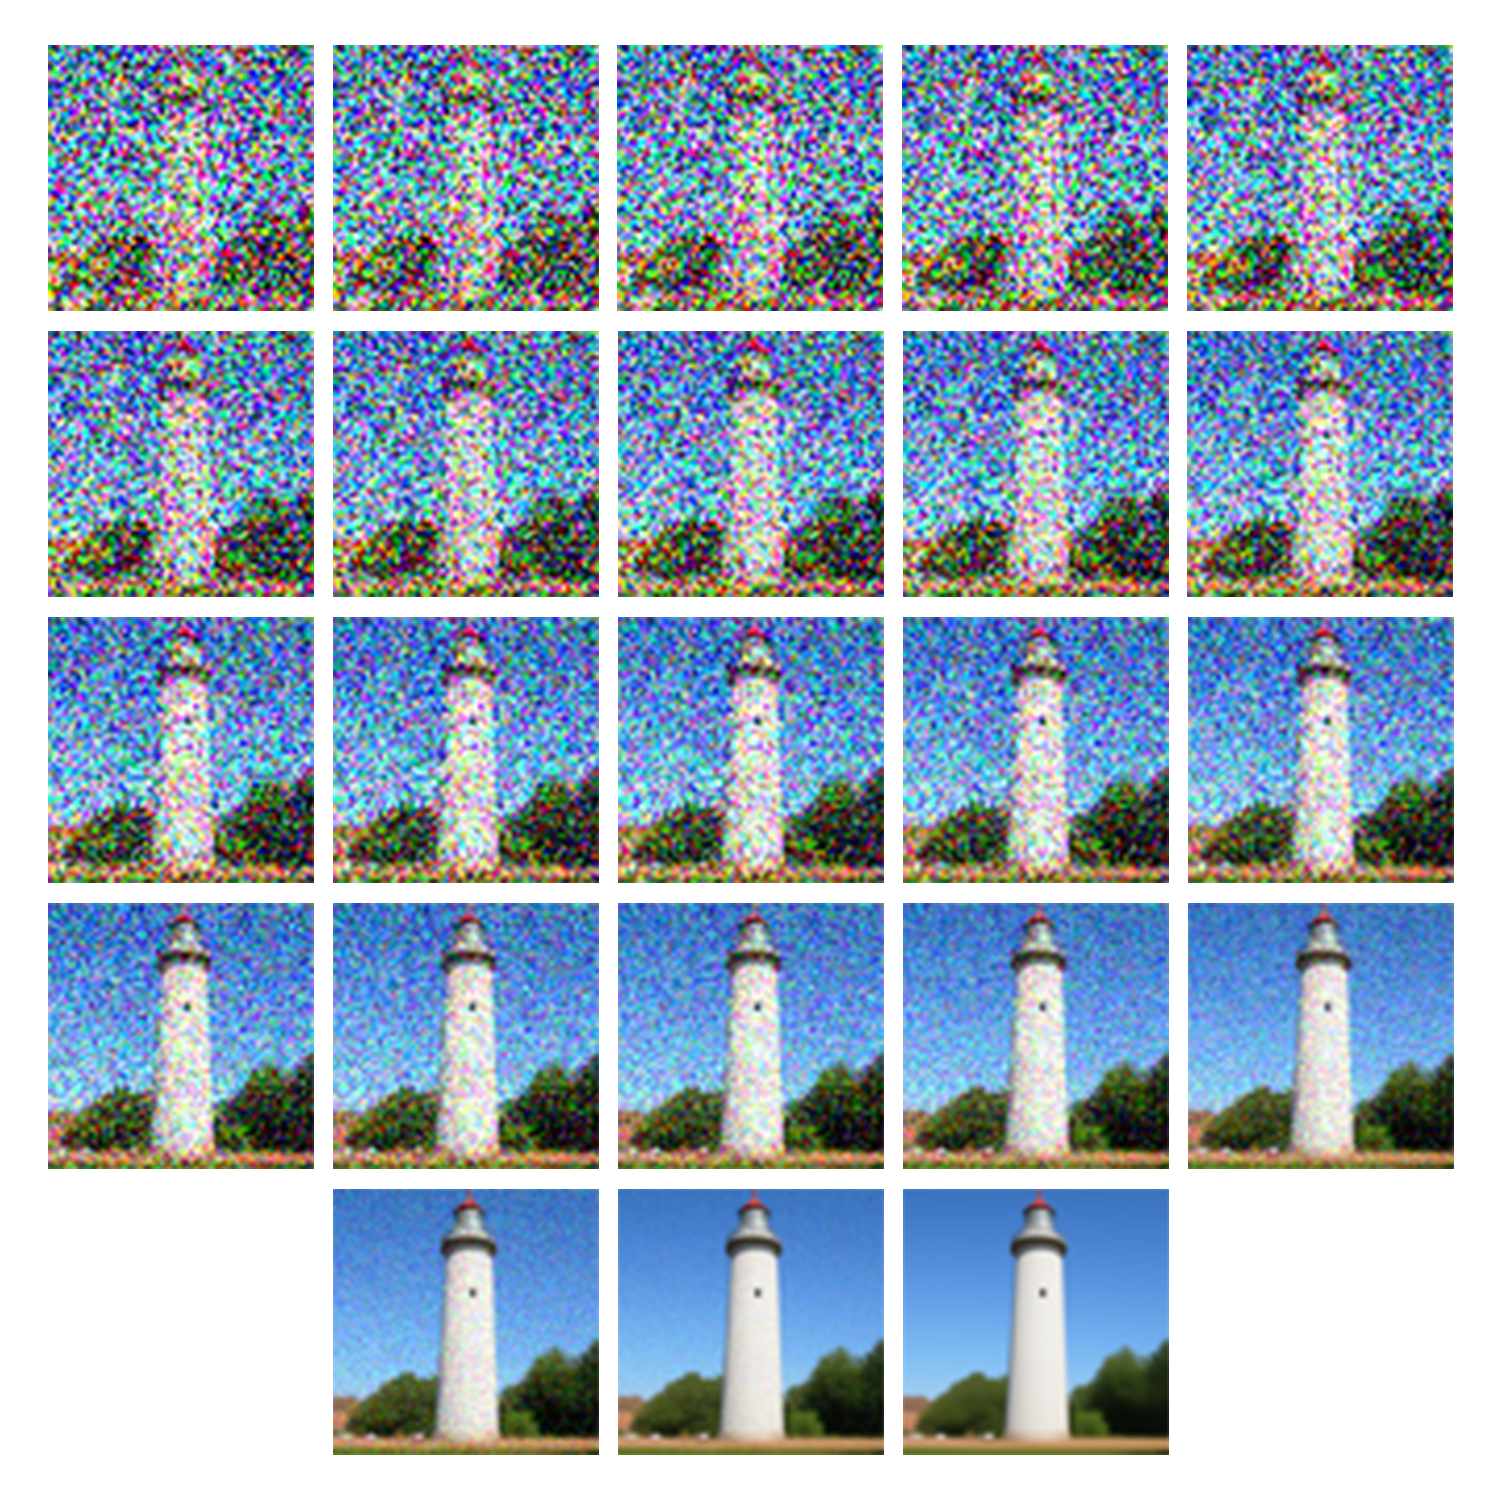

Much better. The Campanile looks like a lighthouse!


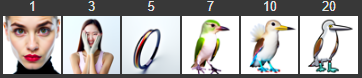
Now that we have implemented iterative denoising, we can generate images from pure noise. Instead of starting at t=690 (or i_start=10), we can start at t=990 (i_start=0), which is an image made up of completely random noise.
10 examples with text prompt ‘a high quality photo’:
It doesn’t seem like the generated images above look very convincing or high-quality. In this section I implement Classifier-Free Guidance, where we compute both a conditional and unconditional noise estimate. We combine these two noise estimates using a scaling factor gamma that controls the CFG strength. When gamma=0, we get only the unconditional noise estimate. when gamma=1, we only get the conditional noise estimate.
When gamma > 1, we get much higher quality images.
5 examples with gamma = 7:

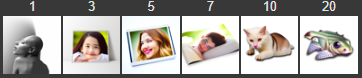
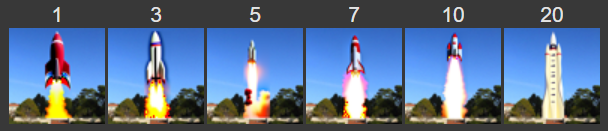
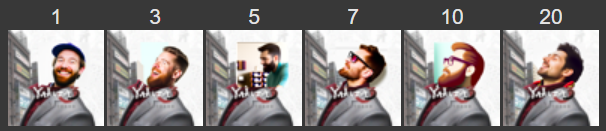
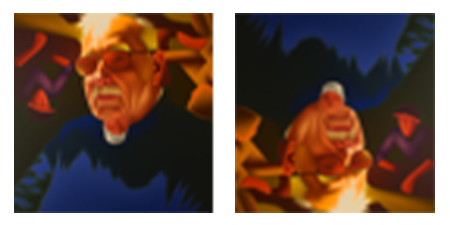
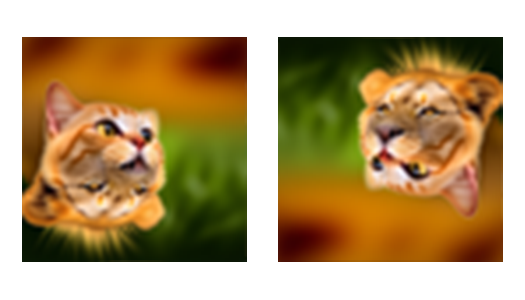
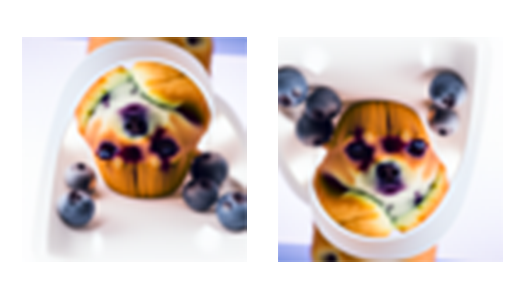
In this part, I add varying levels of noise to an image and denoise using iterative CFG. By denoising from slightly noisy images, we are allowing the diffusion model to be ‘creative’ and add things that were not there before.
Below are images denoised at i_start = 1, 3, 5, 7, 10, and 20. The smaller the i_start (noisier image), the less similar the result is from the initial clean image.


What happens if we try the same image-to-image translation on non-realistic images and drawings?


We can perform a masked denoising to only edit a specific part of an image. After each iterative step in denoising, we ‘force’ the parts outside of the mask to be the same image, while the parts inside the mask continue to be denoised.

The previous examples of image-to-image translation and inpainting were all used with the text prompt ‘a high quality photo’. In this part, I change the text prompt to ‘guide’ the edits that the diffusion model makes (at varying noise levels like earlier).

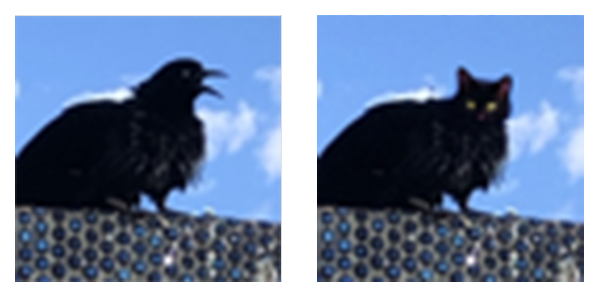
In this part, I implement visual anagrams using diffusion models. To do this, I obtain two noise estimates. One is from a UNet denoising from a completely noisy image with one text prompt. The other is from a UNet denoising on the noisy image upside down, with a different text prompt. At each step of the iterative process, I compute these two noise estimates and take their average to obtain the final noise estimate.
It is also possible to create hybrid images using diffusions models. Similar to the visual anagrams, I compute two separate noise estimates for two separate text prompts (but this time one of them is not denoising a flipped image). Then, I apply a lowpass filter on one estimate and a highpass filter on the other. Adding the two resulting values together gives me the final noise estimate.
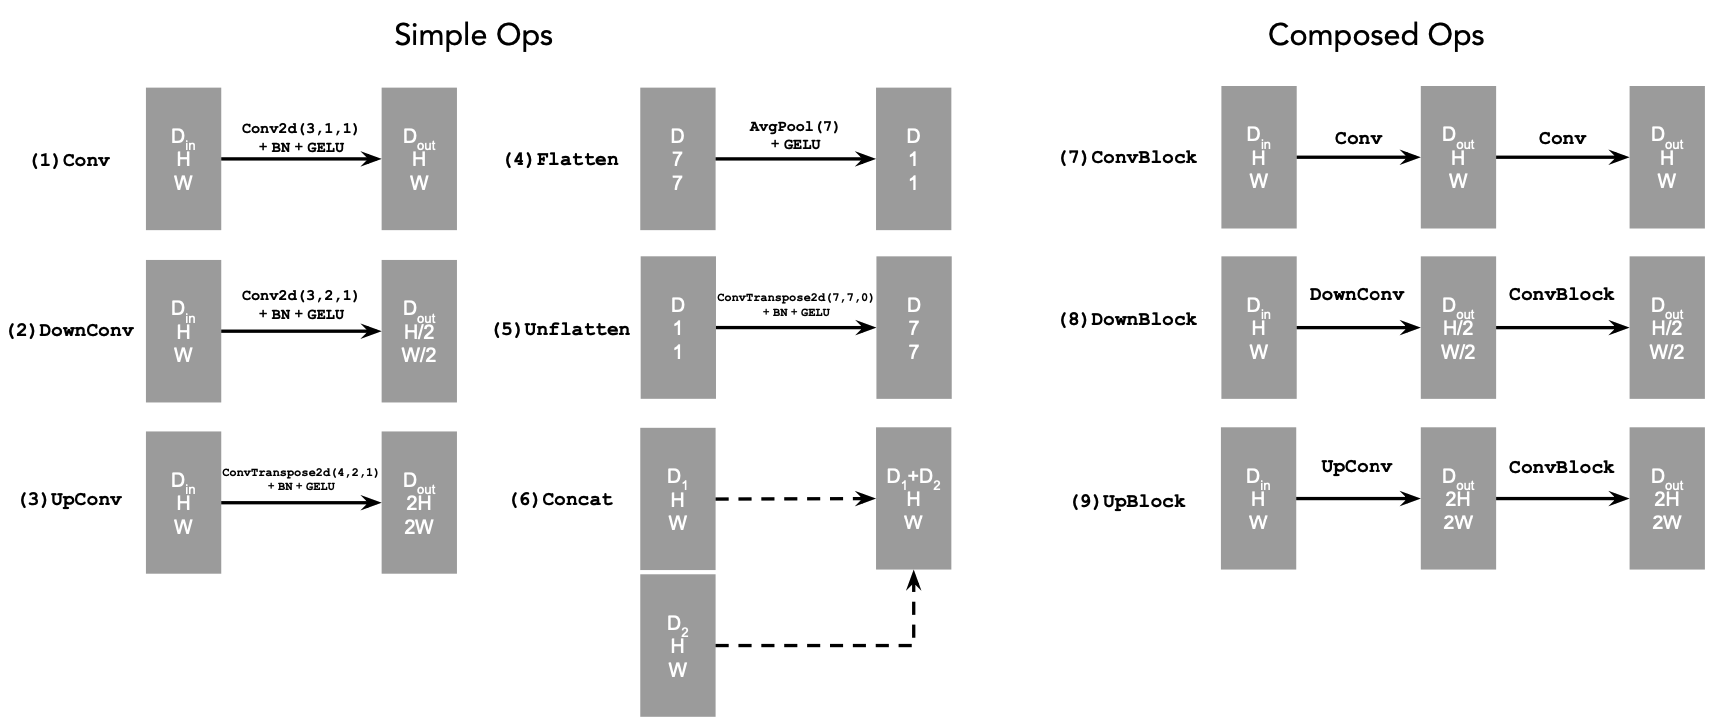
In these last two parts, I implement a UNet from scratch and use it to denoise MNIST digits.
To add noise to a clean image x, we use the following equation, where epsilon is randomly sampled from a standard normal distribution.

We can vary the sigma value to adjust the strength of the noise.
Example of noising process using sigma = [0.0, 0.2, 0.4, 0.5, 0.6, 0.8, 1.0]. In the image, the sigma value increases from left to right:

First, I implement an unconditional UNet.
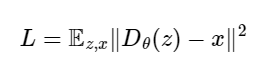
For the unconditioned UNet, we optimize over the following loss, where D is our denoiser and x is our clean image:
After training for 5 epochs with batch size = 256, sigma = 0.5, and hidden dimension D = 128…
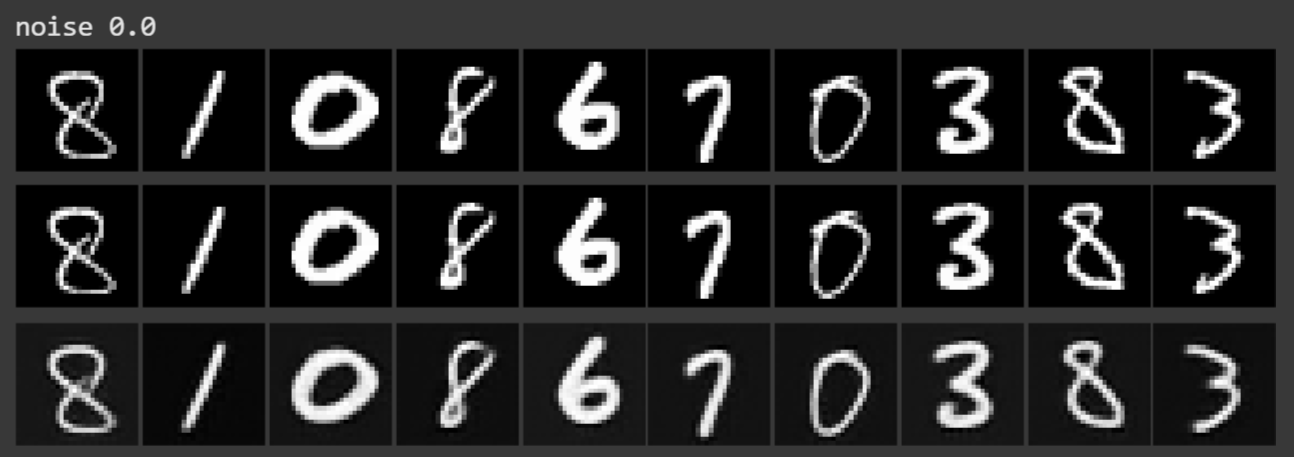
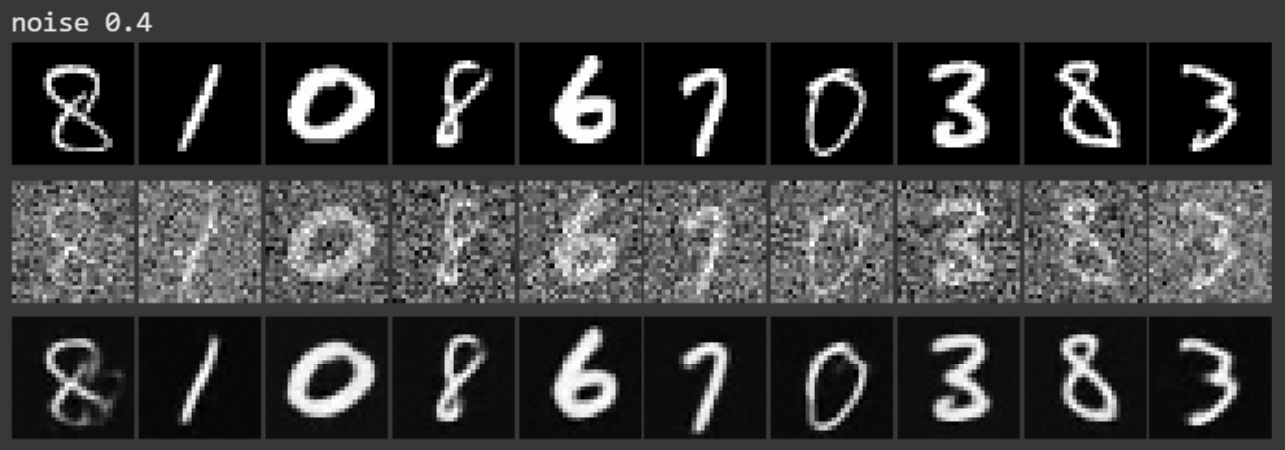
For each of the images below, I display a row of the clean images, then a row of the images with sigma = 0.5 of noise added, and then a row of the denoised image
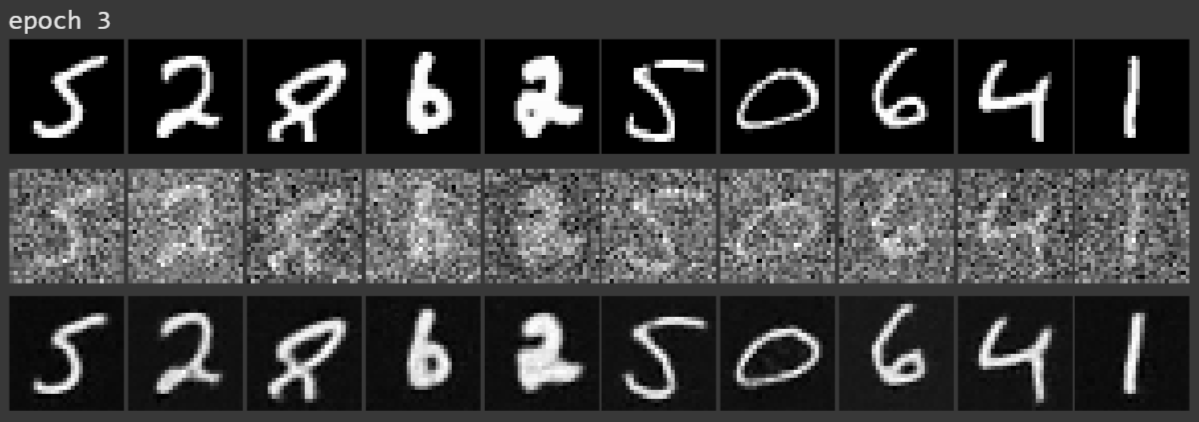
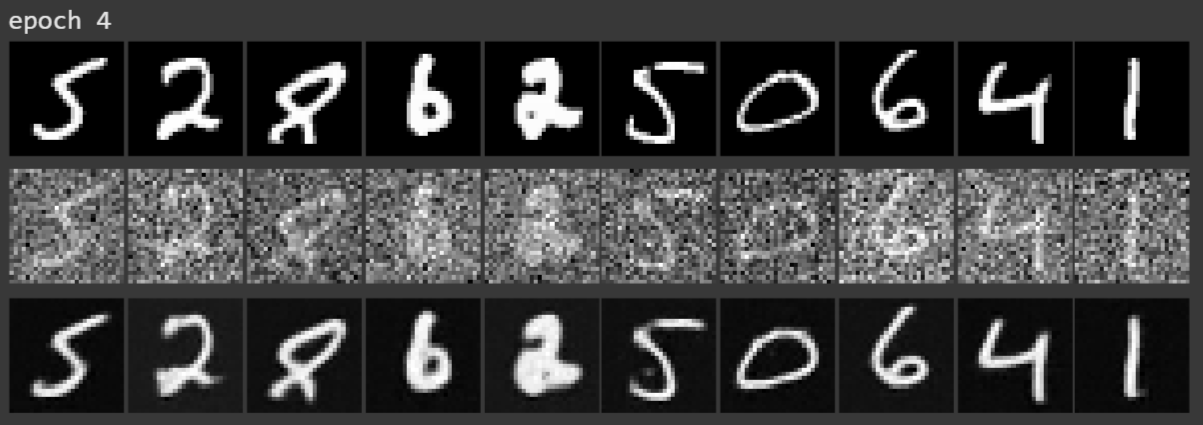
Sample results per epoch:
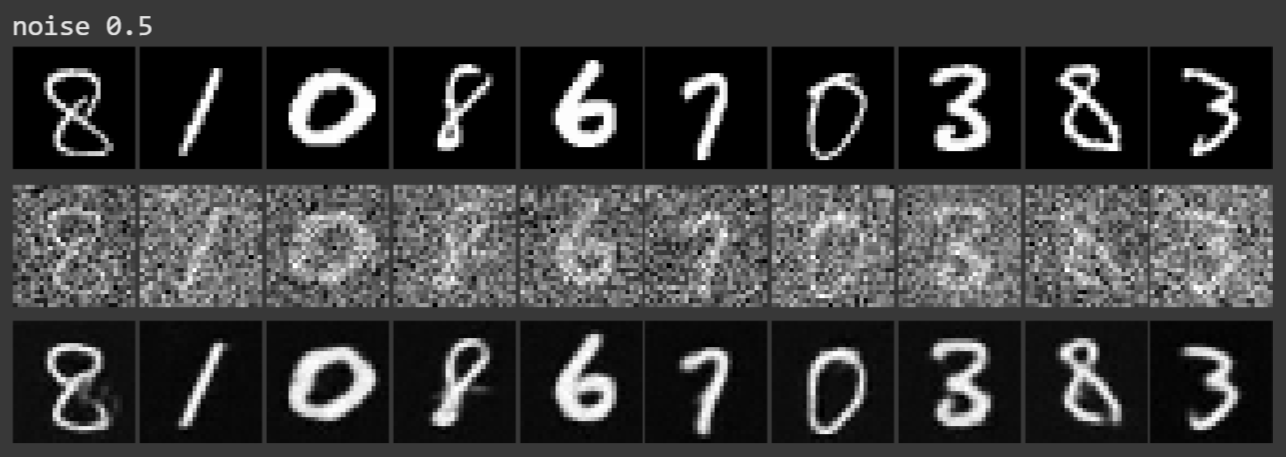
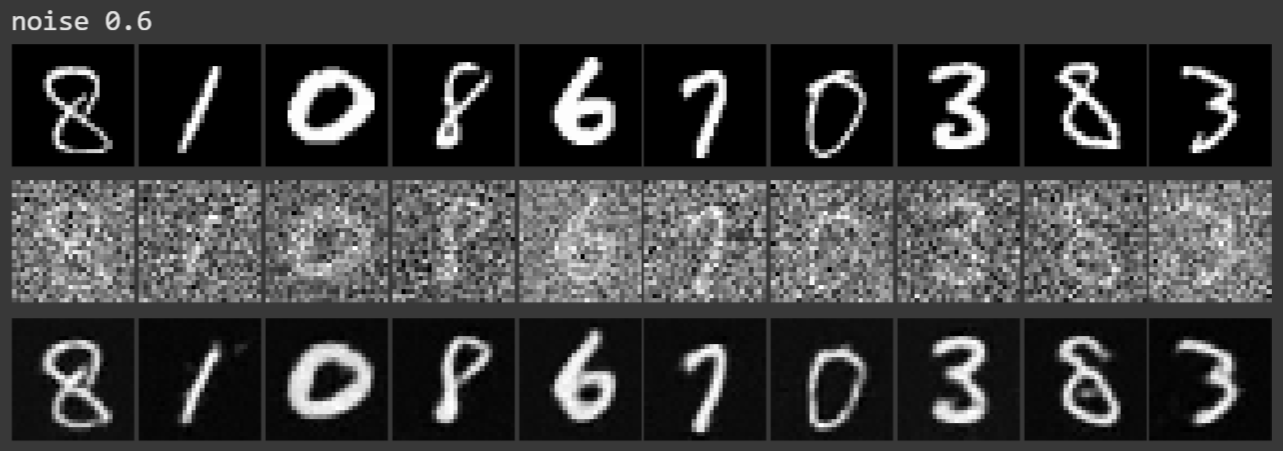
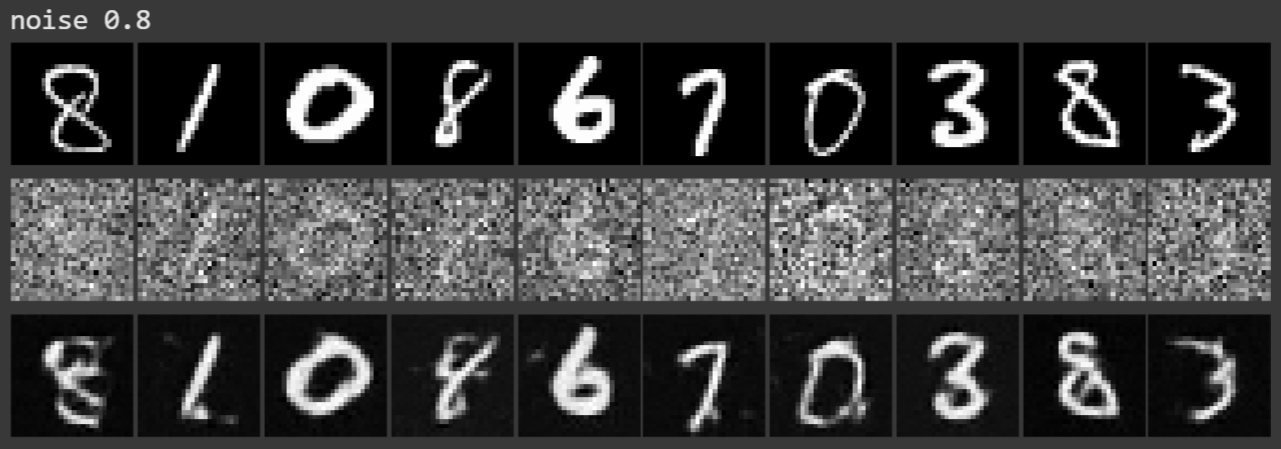
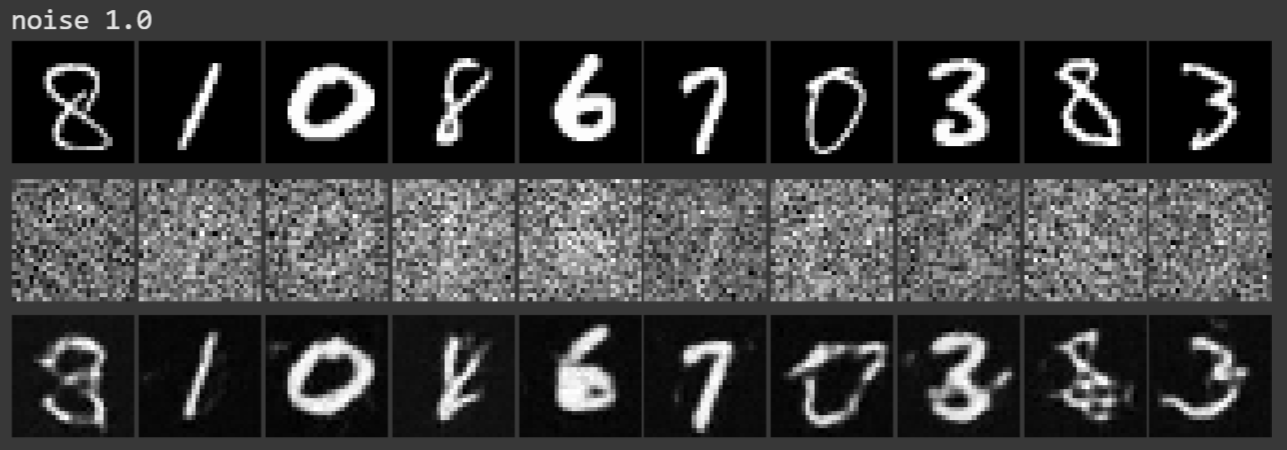
Sample results per noise level (varying sigma value). Sampled after training the UNet for 5 epochs:

In this part, I train a UNet that can iteratively denoise an image.
Hyperparameters used: 20 epochs, hidden dimension D = 64, batch size = 64.
Conditioned UNet architecture
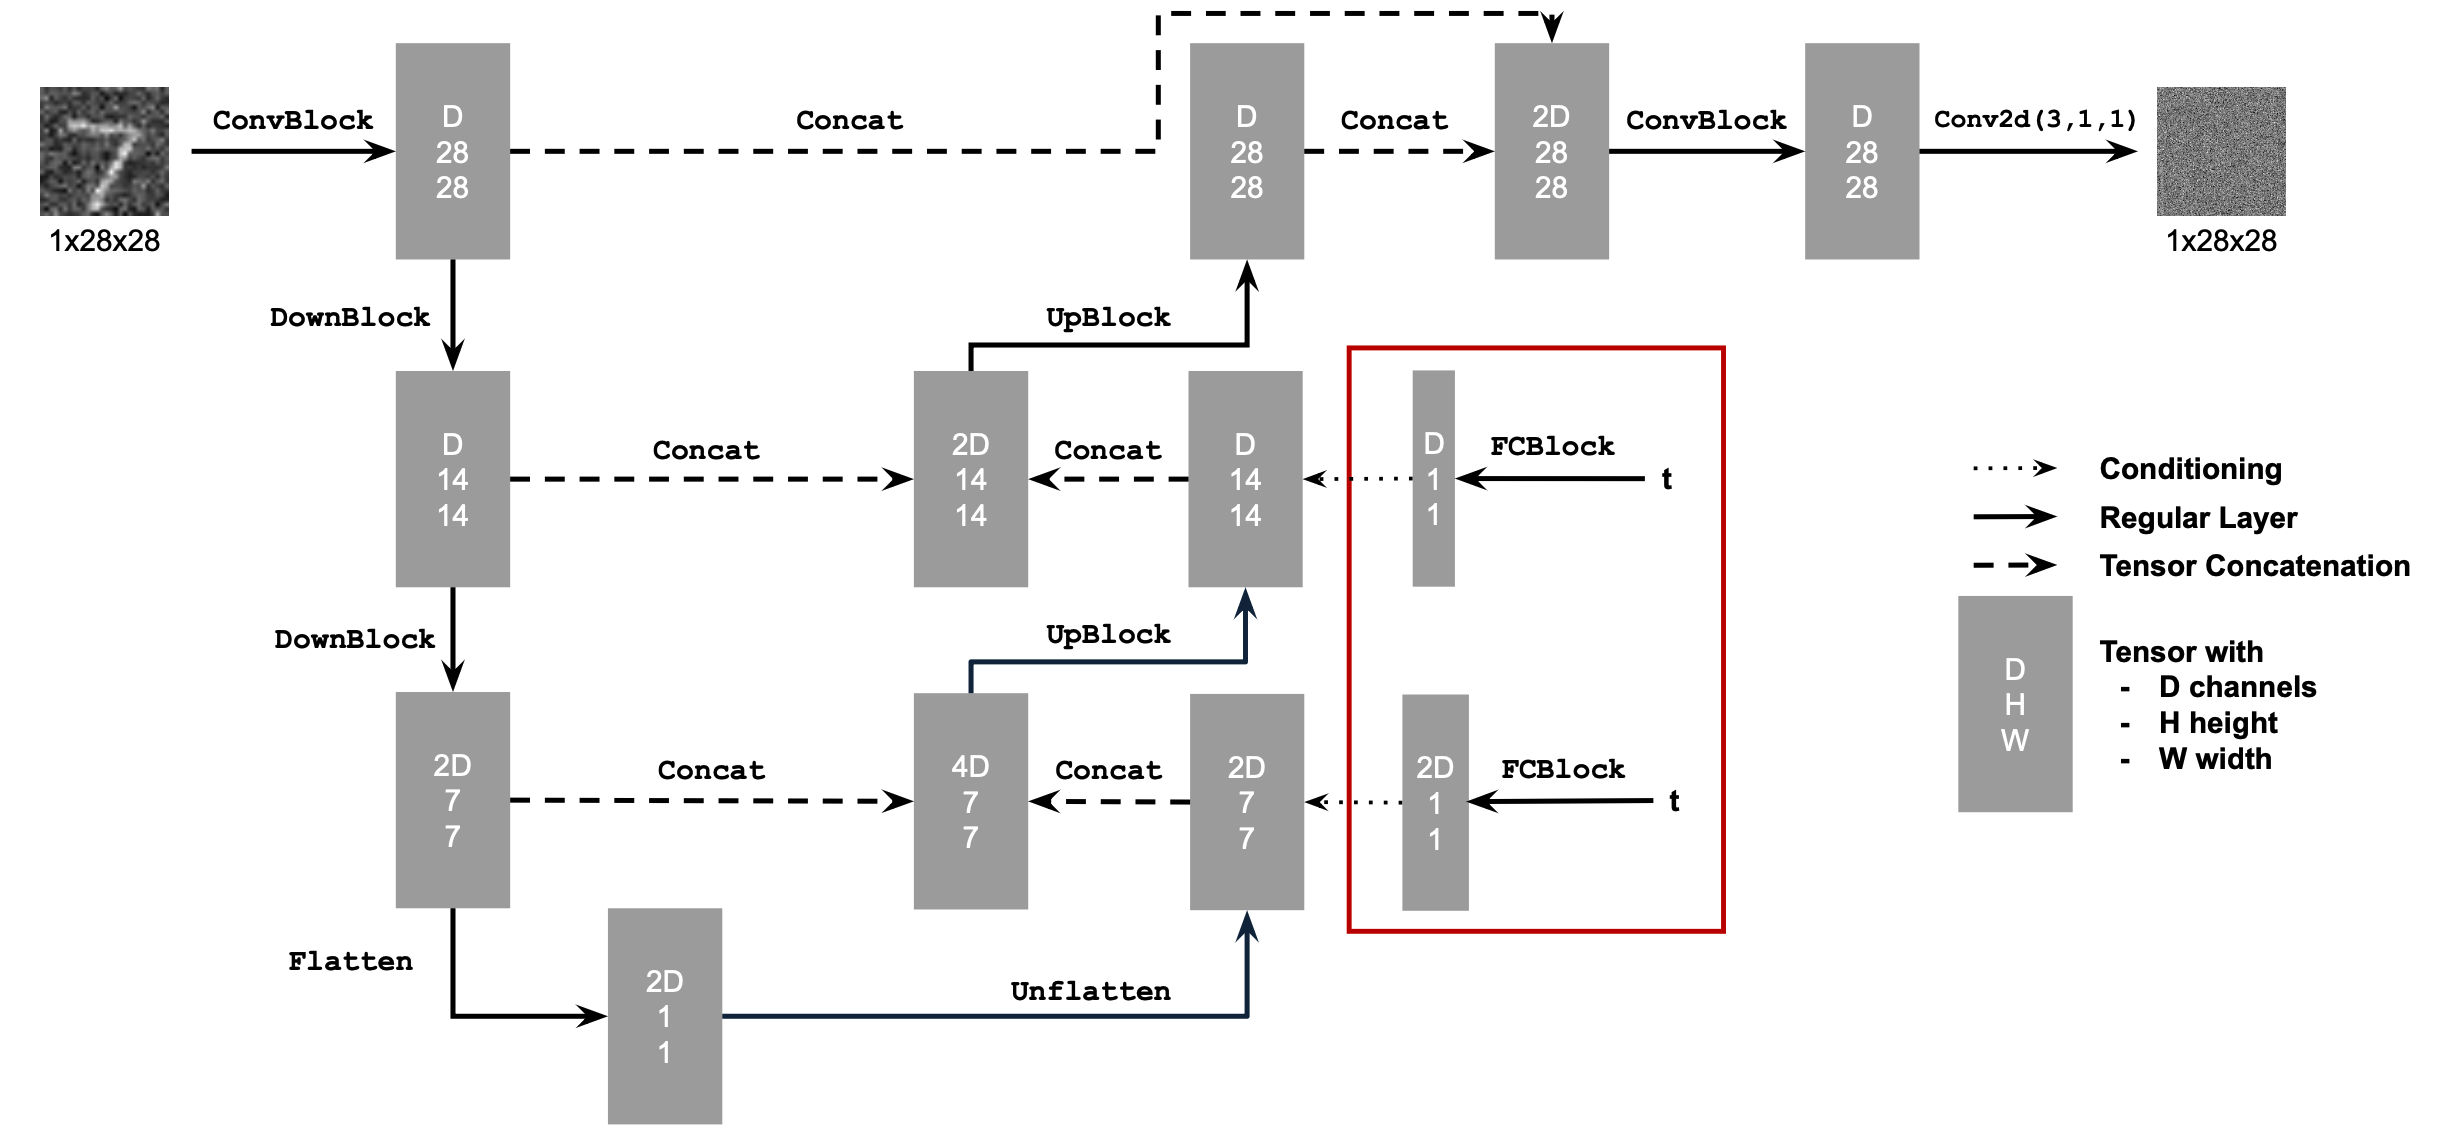
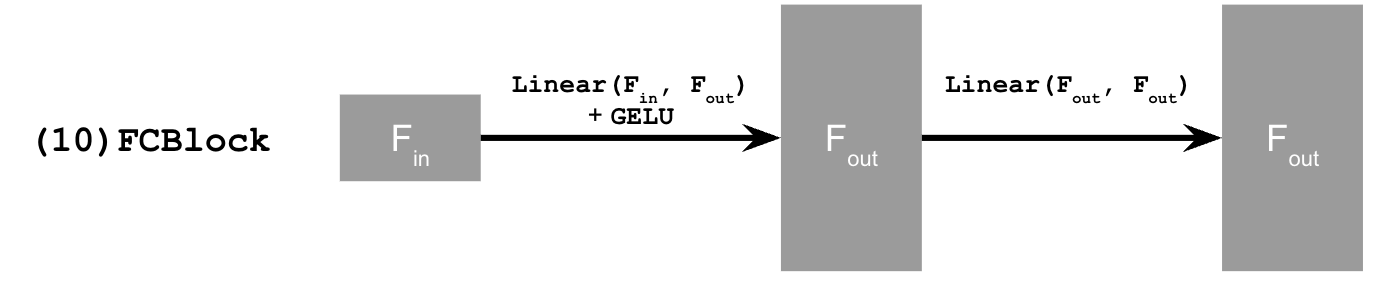
FCBlock operation breakdown
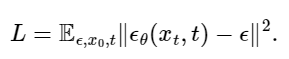
These conditioned UNet models predict the noise in an image, so the loss function is based on noise estimate epsilon instead of the image:
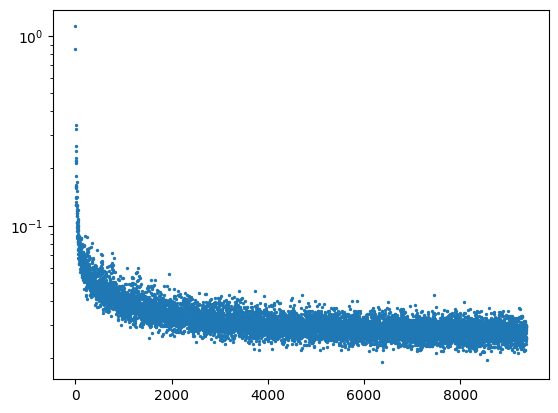
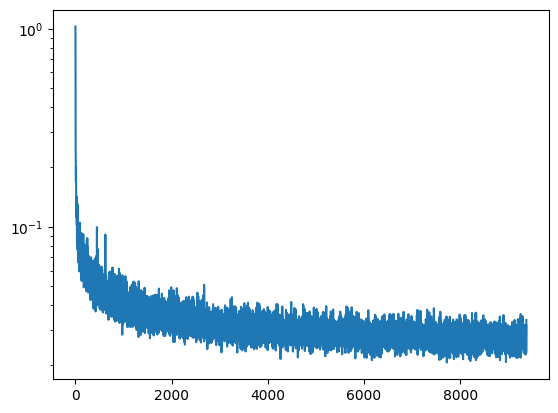
First, I train a version of the diffusion model that is conditioned on timestep t. This model predicts the noise in an image, given a noisy image and a timestep t.
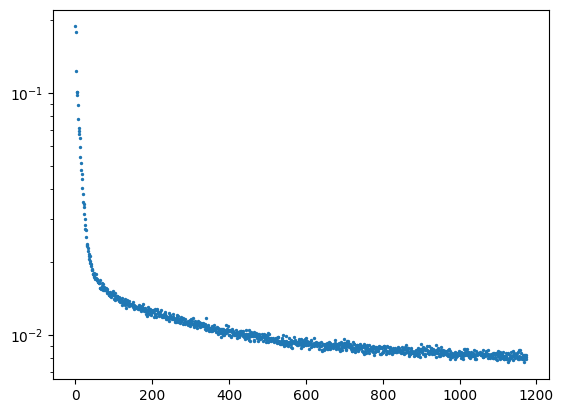
Training loss curve plot:
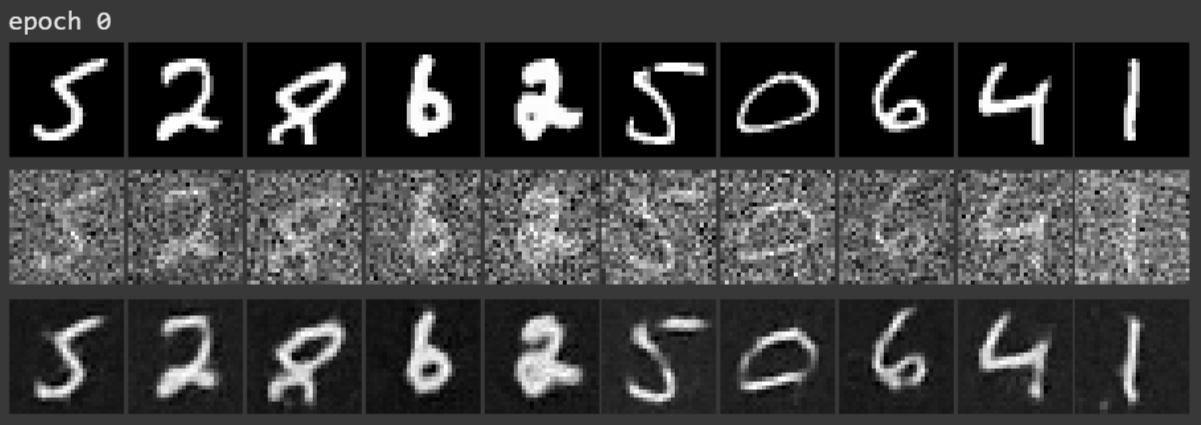
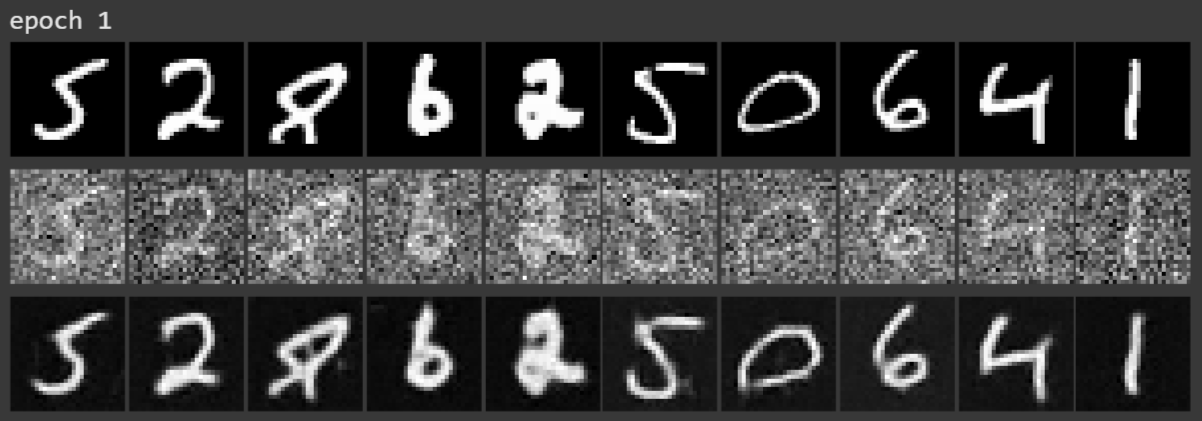
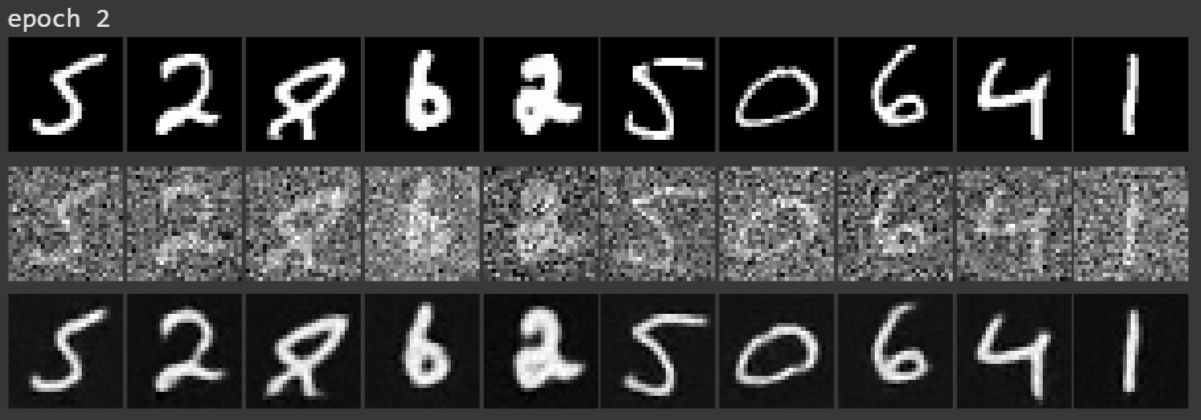
Sampling results for epochs 1-5:
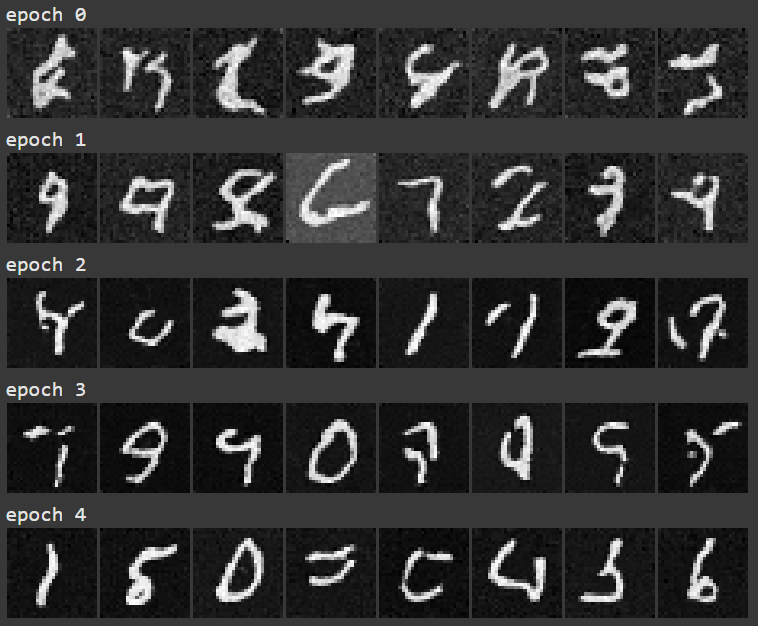
Sampling results for epochs 16-20:

The time-conditioned UNet can iteratively denoise from a completely noisy image, but the resulting number is random. In this part, I implement a class-conditioned UNet that can selectively denoise digits decided by the user. To ensure that this UNet can still work without being conditioned on class, I implement a dropout rate of 10% (during training, 10% of the time the class conditioning vector gets set to 0). Additionally, I add CFG to with gamma = 5.0 to improve the quality of the results.
Training loss curve plot:
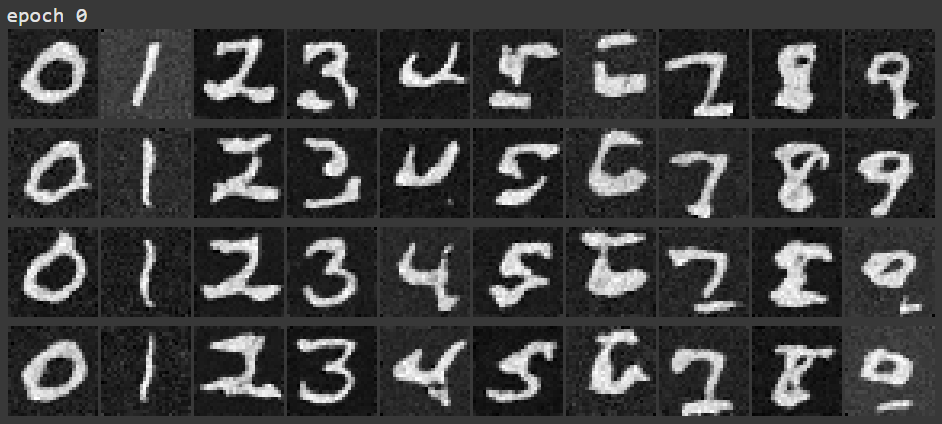
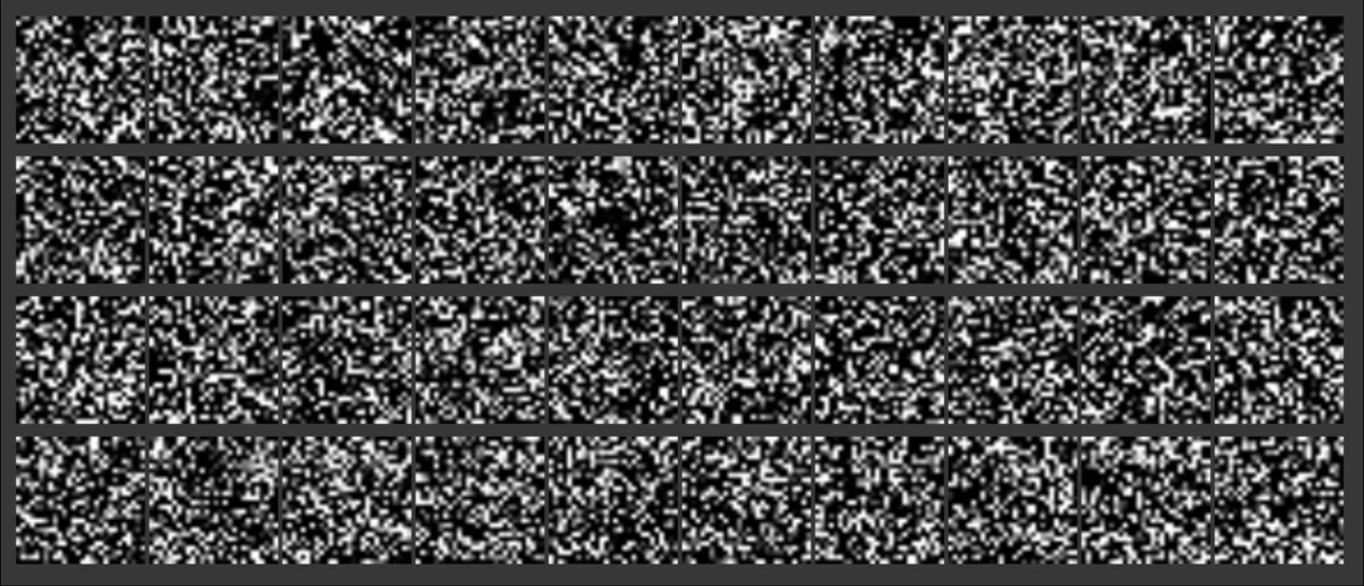
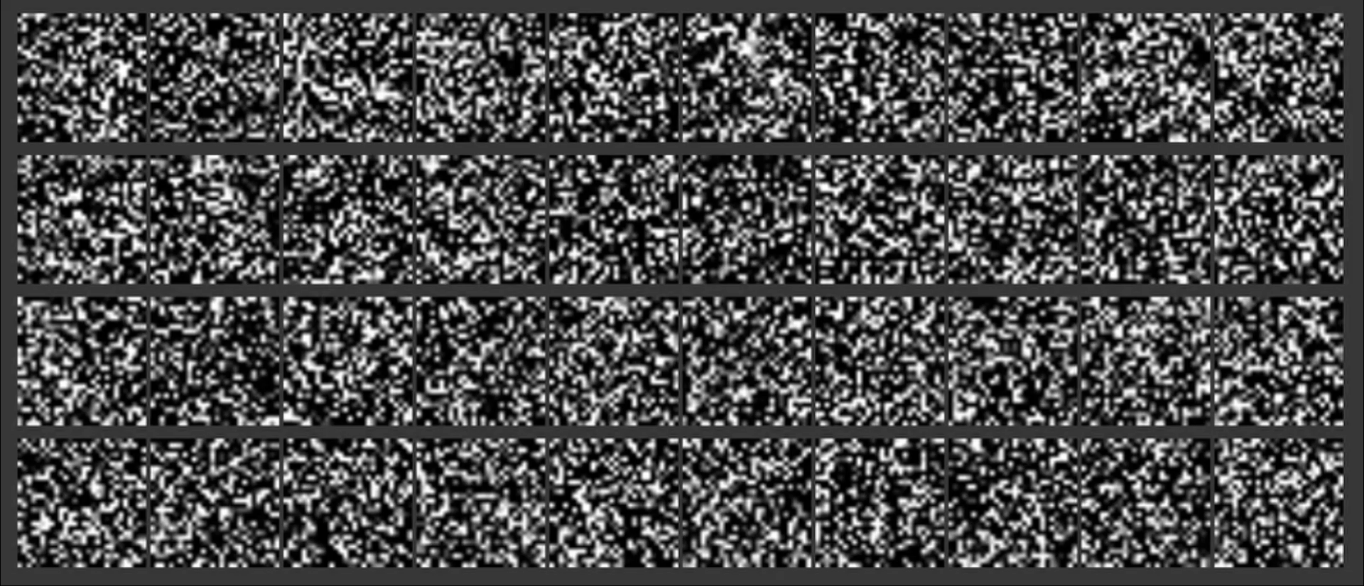
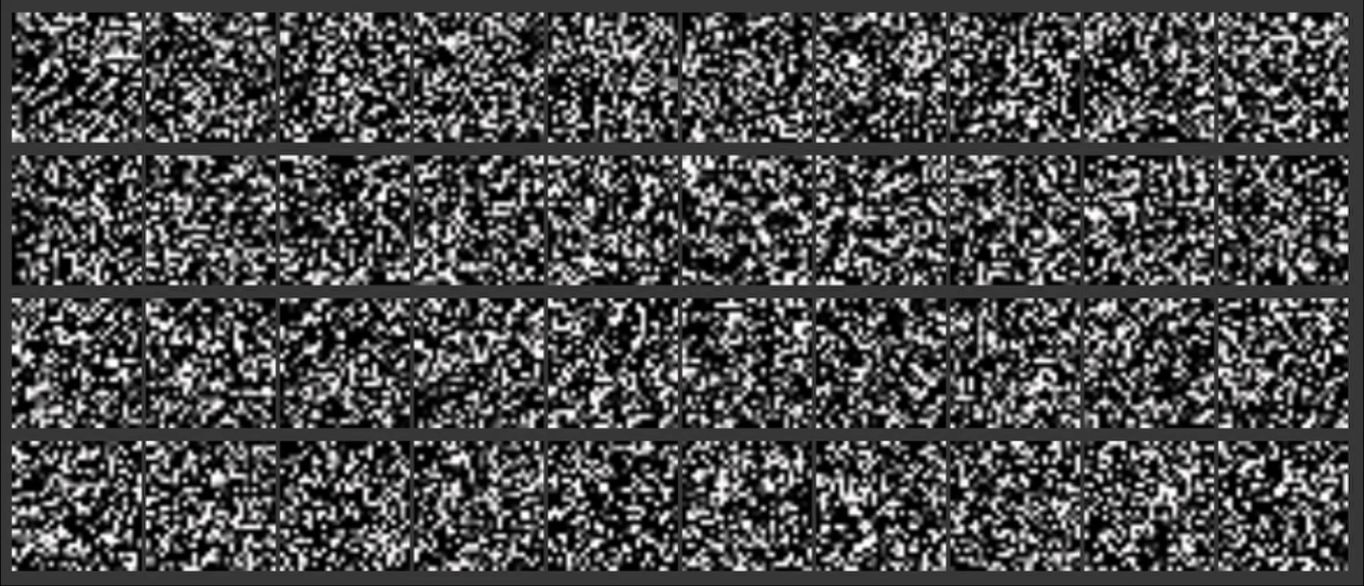
Sampling results for epochs 1:
Sampling results for epoch 5:
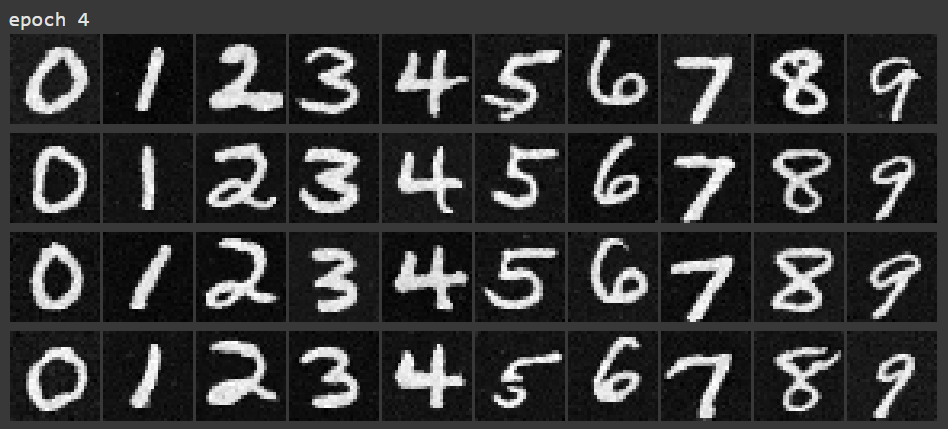
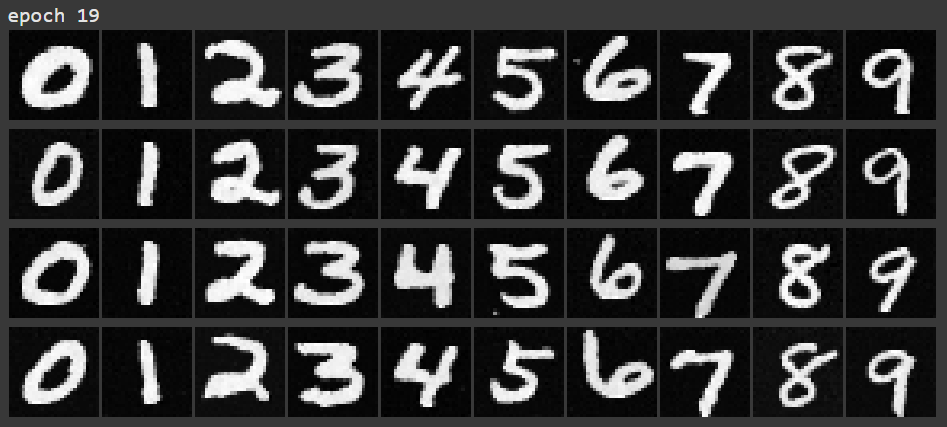
Sampling results for epoch 20:
Time-conditioned UNet:
Class-conditioned UNet:
Class-conditioned UNet with c vector of all zeroes:
I think the coolest thing I learned from this project was how to implement iterative CFG denoising. It was very interesting to feed my own images into the diffusion model at different noise levels to see what interesting edits it could come up with. I think it’s also impressive how for inpainting, the edits tend to be seamless with the rest of the image.